
The making process of Poster
Software: Adobe Flash Professional CS5
Firstly create a script 2.0 with 320x240px.

A) Old film effect (Old Grains Effect)
Step 1: Use pencil tool to draw Draw 3 small curved strokes on your canvas as shown in the screenshot below.

Step 2: Click on one of the strokes, and press F8 to convert to symbol. Choose Movie Clip for the type and keep the Registration point centered.

Step 3: While your symbol is now selected on stage, press F9 to open up the actions panel for our new movie clip and paste the following code.

Code:
onClipEvent (enterFrame) {_x = random(640);
_y = random(480);
_rotation = random(360);
_alpha = random(100);
_xscale = nue;
_yscale = nue;
nue = random(65);
}
*This code will command the small stroke to move randomly around the whole canvas.
*Repeat this step for the other two remaining strokes on stage, convert them to movie clip symbols and then assign the same code to them.
Step 3: Create a line with line tool.

Step 4: so press F9 to bring up the actions panel and paste the following code.
Code:
onClipEvent (enterFrame) {_x = random(640);
_alpha = random(15);
}
Step 5: Draw a box with rectangle tool and go to window>color (ctrl+shift+F9) to create a new radial gradient.

*Set the 3 anchorin color bar as
First Anchor: 0% Alpha, Color #010101
Second Anchor: 100% Alpha, Color #FFFFF
Third Anchor: 0% Alpha, Color #FFFFFF
Second Anchor: 100% Alpha, Color #FFFFF
Third Anchor: 0% Alpha, Color #FFFFFF
 |
| Final outcome |
Step 6: Create 2 key frame at 1 and 16 then apply motion tween.

Step 7: Click anywhere on the first portion of the tween and set the Ease to 100. Set the ease for the other portion to -100.

Step 8: Go back to your scene and select the movie clip that we were just working on. Press F8 to show the Actions Panel and paste the following code:
Code:
onClipEvent (enterFrame) {
_alpha = random(20) + 10
}
Then Alt+drag to duplicate the effect until flame 236. The effect will continue until flame 236.
B)Typography
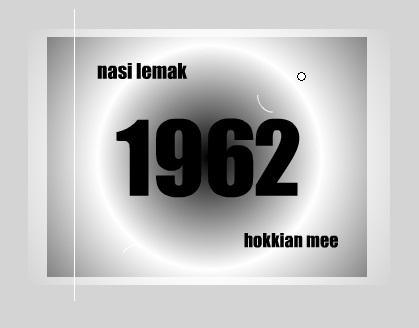
Now i start the typography part which is the main idea of who poster.
Step1: Use text tool to write 1957

Step 2: Make a few key frame then slightly move the position of 1957 to created a lagging illusion to the viewer.
Step 3: Add the food name with text tool around the 1957.

Step 4: In the same time, change the year 1957 to 1958 then keep switch until year 2011 to show the time flowing.


Step 5: Arrange the timeline nicely so it flow tidy.
Step 6: Break apart all the words

Step 7: Then distribute them to layers. Create folders for the words and arrange them.

Step 8: Apply motion tween to all the words and the use free transform tool to move the words randomly and outside the stage.

Step 9: Import the image "Let's Eat" created with Adobe Illustrator to the stage.

Step 10: Apply motion tween to it and drag it to the top of the 2011 from left to right with free transform tool.

Step 11: Create 'malays' and 'a' with text tool and apply movement to them towards the 1 and the same time, apply motion tween to 201 and move them out of the stage downward.

Step 12: Import the twin tower create by illustrator and add color effect to it. Set from Alpha 0% to 100%.


Step 14: Apply motion tween to all of them and move them out of the stage in random path.

Step 15: Then reverse all the keyframes. Then it will lose like the words go into the stage from outside.

Step 16: Create a rotation for the 'a' of "let's eat". Apply tween motion and set it as below

This is all the steps for my Assignment 2. I will upload my final dynamic poster in next post. XD
No comments:
Post a Comment